The 10ninety Property Management System contains a comprehensive range of letter, email, brochure and document templates. The central set of templates are managed under the top-level “Templates” menu, where it is possible to add, update or delete templates.
Note - the article below explains how to add templates using the system's online text editor. It is also possible to create more complex documents or letters using Word templates, as explained here.
Once you've established where to add your template using this guide, you may be wondering which tags are best to use, this is explained here.
Where do I add my template?
Under the 'Templates' tab, there are two options in the blue strip to select to add your template. Please see a description for each option below.
The section that you add your template is very important, this dictates which merge tags you have access to.
Letters & Emails - This area should be used to add any email or letter templates into the system. Letter templates will have your pdf letterhead applied with your branding when you generate them.
Quick Example: if the template is a letter to a tenant about something letting specific. (rent increase, move in/out etc) You would add it under 'To Tenant' and then in the 'Letting Template' sub-section.
Documents - This area should be used to add any contracts between you and your clients, tenancy agreements and guarantor agreements.
Quick Example: if the template is an APT, this means that it is letting specific. You should add it in the 'Letting' sub-section.
Adding a new letter or email template
- Click on the top-level “Templates” menu
- Identify who the template is for and click on the corresponding section (e.g. if the letter is for landlords, click on the “To Landlord” section)
- The screen will expand to reveal the different contexts that the letter or email can be created (e.g. if the landlord letter is related to a landlord’s residential property, the relevant context will be “Residential Lettings Property Templates”; if the letter relates to a letting at one of the landlord’s properties, the context is “Letting Templates”
- Having identified the relevant context for this new template, click the “Add” link beside that section. TIP! If there is a "General" template available, another option is to click on that and click the "Copy" button to use that template as a starting point - it will already have the basic salutation and sign-off structure included.
- Type in the name and a brief description of this new template, and select the relevant layout. Click “Add” to save down the basic details of this new template.
- Click “Edit” to do start entering the text for this new template.
- Refer to the “Editing Template Text” section below for further details.
Adding a new document template
- Click on the top-level “Templates” menu
- Click on the “Documents” sub-menu
- Identify the context of template and click on the corresponding section (e.g. if the relates to a residential sales property, click on the “Residential Sales Property” section).
- Click the “Add” link beside that section.
- Type in the name and a brief description of this new template, and select the preferred layout (“Document Layout” will include your standard letterhead, whereas “Document Layout No HF” will have no headers or footers). Click “Add” to save down the basic details of this new template.
- Click “Edit” to do start entering the text for this new template.
- Refer to the “Editing Template Text” section below for further details.
Editing template text
Having clicked “Edit” to start editing the content of a template:
- An editor window will be displayed where you can update the content of the template. The window contains a number of buttons at the top, similar to those found in a Word document – e.g. text can be made bold or italic, font size changed, tables inserted etc. Hovering over each icon will identify its function.
- The templates can also include placeholders or “tags” which get swapped out with the live data when the actual letter/email/document is generated (similar to Word mail merge fields). Each data field in the system will have a corresponding tag that can be inserted, although the tags available to insert into a template will depend on the context of the template (e.g. the vendor name tag could not be included in a letting letter).
- To insert a tag:
- Click in the editor window where you want the tag to be inserted – this will place the cursor in that position.
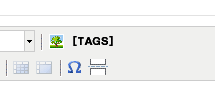
- Click on the [TAGS] button at the top right of the editor window:
- Moving down the list of sets of tags will expand the set to reveal all tags available in that set (e.g. hovering over “Landlord Tags” will reveal all landlord tags that are available):
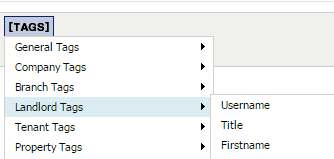
- Click on the tag that you want to insert
- The system will insert the tag into the template, at the position of the cursor.
- To save your changes, click the “Save” button. We recommend you save your changes frequently if it is a large template.
0 Comments